Edit Mode Tools
A set of edit mode operators for aligning, centering, and reprojecting your GP strokes. Fix strokes that have drifted off-origin, flatten drawings back onto the canvas plane, or flip and rotate poses. Every tool supports multi-frame editing.
The panel
Section titled “The panel”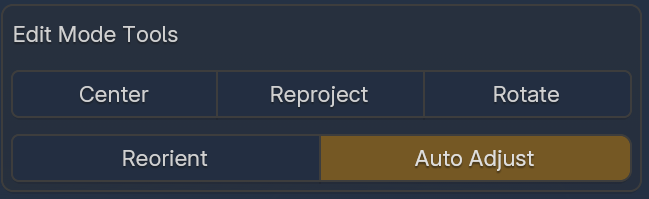
Center
Section titled “Center”Moves strokes to the GP object’s origin — bounding box centered horizontally on X, bottom edge placed at Z=0. Works on selected points in the active layer.
Useful when strokes have drifted off-origin after editing. With multi-frame editing enabled, each selected keyframe is centered independently.
Reproject
Section titled “Reproject”Calls Blender’s native grease_pencil.reproject operator to flatten strokes onto the selected plane while preserving their on-screen shape. Works across all visible layers.
Use this if your strokes have drifted and you need to flatten them all on one plane.
Reorient
Section titled “Reorient”Snaps rotated strokes back onto the canvas plane (Y=0) and centers them at the origin. If your drawing got rotated off the canvas via R X, R Z, or trackball, Reorient flattens it back and applies a gravity correction to keep figures upright.
When strokes are already flat on the canvas, pressing Reorient flips the drawing front-to-back — mirroring across the X axis, like flipping your paper over.
Auto adjust mode
Section titled “Auto adjust mode”Enable the adjust toggle (rotation icon) to fine-tune orientation after pressing Reorient — move the mouse left/right to rotate around the canvas normal before committing. LMB / Enter to confirm, RMB / Esc to cancel.
Rotate
Section titled “Rotate”Rotate your strokes around the canvas normal (Y axis). Move the mouse left/right to rotate — the current angle is displayed in the header. Rotates around the centroid of all stroke points. LMB / Enter to confirm, RMB / Esc to cancel.